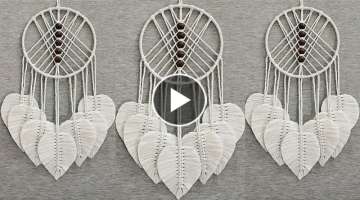
Macrame Tutorial Beginner Chunky, Boho, Tassel, Sand & Sea Wall Hanging 365
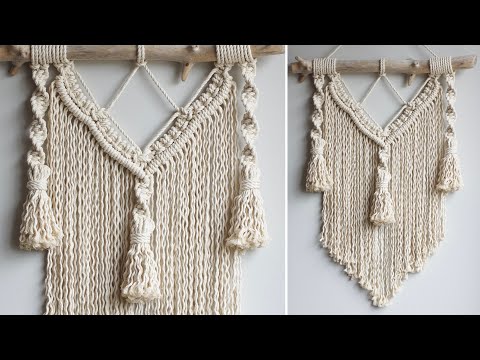
DIY Macrame Tutorial: Beginner Chunky, Boho, Tassel Sand and Sea Wall Hanging! Please see below for materials and written instructions. Shop my book, Mixed Fiber Macrame, and Fiber Art Supplies (string, rope roving, ribbons, velvet and more) on my website or in my Etsy Shop: Website: https://www.lotsofknots.ca Etsy Shop: https://www.etsy.com/ca/shop/LotsofKnotsCanada Support me directly: https://ko-fi.com/lotsofknotscanada Material: - Approx. 170 ft of 6mm 3 Ply Rope (Colour: Natural) Hey guys! I have a really fun wall hanging tutorial for you today to create a chunky, boho wall hanging. The finished wall hanging is 21.5 inches wide and 30 inches long (measured from the top of the driftwood to the bottom). You’ll need about 170ft of 6mm rope to create this wall hanging - this rope is available in my Etsy Shop if you are interested - there is a link in the description. Let’s get started. Set up - Cut 9 pieces of rope, each piece is 8 ft long. Attach your pieces of rope from left to right using Lark’s Head knots with these instructions: Piece 1 - Fold it so that there is 2.5 ft on one side and 5.5ft on the other. Attach it to the left side of your work so the 5.5ft piece is on the left side. Piece 2 - Repeat the instructions for piece one but attach it so that the 5.5ft piece sits on the right side. Pieces 3 - 7 - Fold each piece in half. Attach 2 pieces to the right of the first two pieces, attach the next piece in the middle of your work, and attach 6 and 7 about 6 inches to the right of that. Pieces 8 and 9 - fold in the same way you folded the first two pieces and attach to the right of piece 7 making sure that the inner cords are the short cords. Skip the first 4 cords and tie a square knot with the next 4 cords. Repeat on the right side of your work. I’m going to tie left facing square knots on the left side of my work and right facing square knots on the right but feel free to tie them however you’d like. Using 3 cords from underneath the first square knot and one cord from the centre tie a another square knot about 4 inches down from your driftwood. Repeat on the right side of your work. Using 3 cords from the left and 3 cords from the right tie another square knot around 4 filler cords in the middle of your work. This square knot should sit about 8 inches down from the driftwood. We will now add cord to these sections. Cut 16 pieces of rope, each piece is 4 ft in length. Fold each piece in half and attach in groups of 4 to your work using Lark’s Head knots. Attach the other 2 groups of 4 on the right side of your work. We will tie a row of double half hitch knots (DHHKs) along each side of our work. If you are uncomfortable with the DHHK you can leave this section out. Using the fifth cord from the left as your filler cord tie 20 DHHKs working down and to the right. I like the look of the curved shape for this wall hanging but if you’d rather create a straight line all you need to do is push your DHHKs up your filler cord to straighten out the line. Repeat on the right side of your work. Tie one more DHHK with the two filler cords to connect the two sides. We will tie repeating half square knots to create a spiral. Tie 19 half square knots in total on both sides of your work. Using the 4 middle cords tie 7 repeating half square knots to create a spiral. Cut 24 pieces of rope, each piece is 1 ft in length. Split into 3 groups of 8. Grab one group, fold it in half and using the working cords from the first spiral on the left tie a reef knot or a double knot underneath the cords. Repeat that process to create two more tassels. Turn your work around so that you are working on the back side of your piece. Cut 3 2-foot pieces of rope. Grab one piece and tie a gathering knot around your tassel. I typically leave the cord hanging from the bottom as it mixes in with the other cords. Cut the top cord and use a tapestry needle any extra rope left at the top. Cut the ends to your desired length - I’ve cut mine so that the tassel is approx. 6 inches long. Repeat that process for the other two tassels. I was going for a beach-y vibe with this piece so I decided to untwist all of my rope to create wavy fringe. Feel free to leave as is or untwist your rope. This design creates a bit of a gap in the fringe because of the middle tassel. If you want to eliminate the gap, cut one more 4 ft piece of rope and attach it to the back of the middle DHHK as I’ve done here. Thanks for watching!
Sponsored
Video
Share
Sponsored
Facebook Comments
Popular Videos
Sponsored